Getting started checklist
If you're new to AppMetrica, be sure to start here. This seven-step guide walks you from initial registration all the way to generating your first reports. To ensure you don't miss anything, follow the steps in order.
Each step explains what to do, why it's necessary, who on your team should handle it, and how long it should take. This is a brief checklist: it doesn't replace the main instructions, but rather outlines the order in which to read them. For details, follow the links provided in each step.
Step 1. Register and add your app
Who performs this step: product manager, developer. Time required: 10 minutes.
Note
You need a Yandex ID to use AppMetrica. If you don't have one, be sure to register.
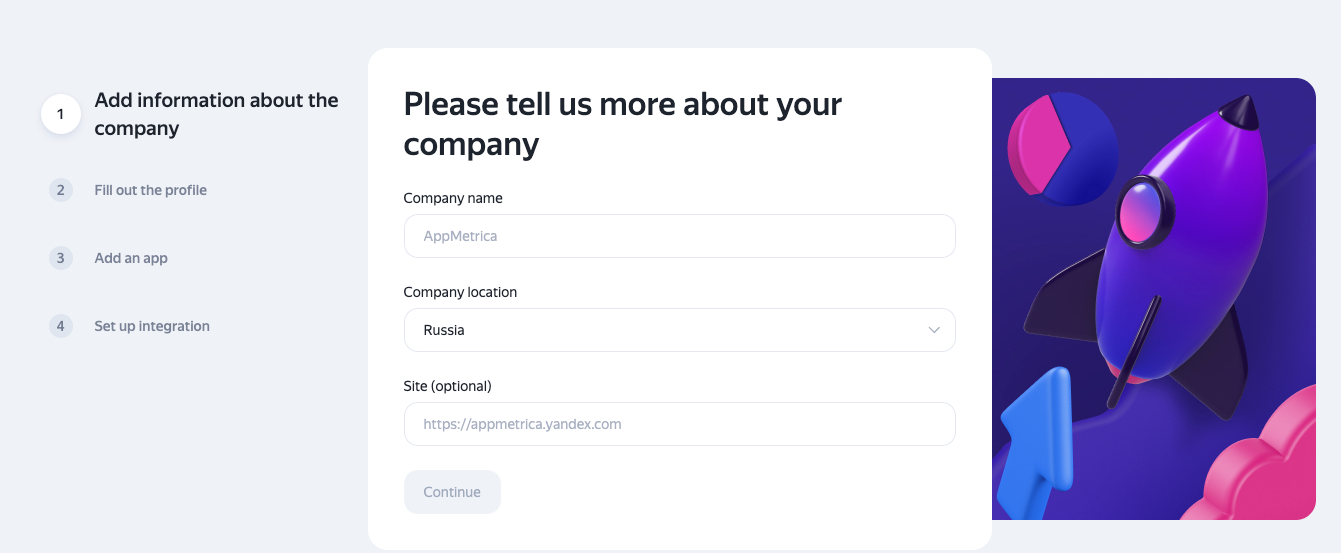
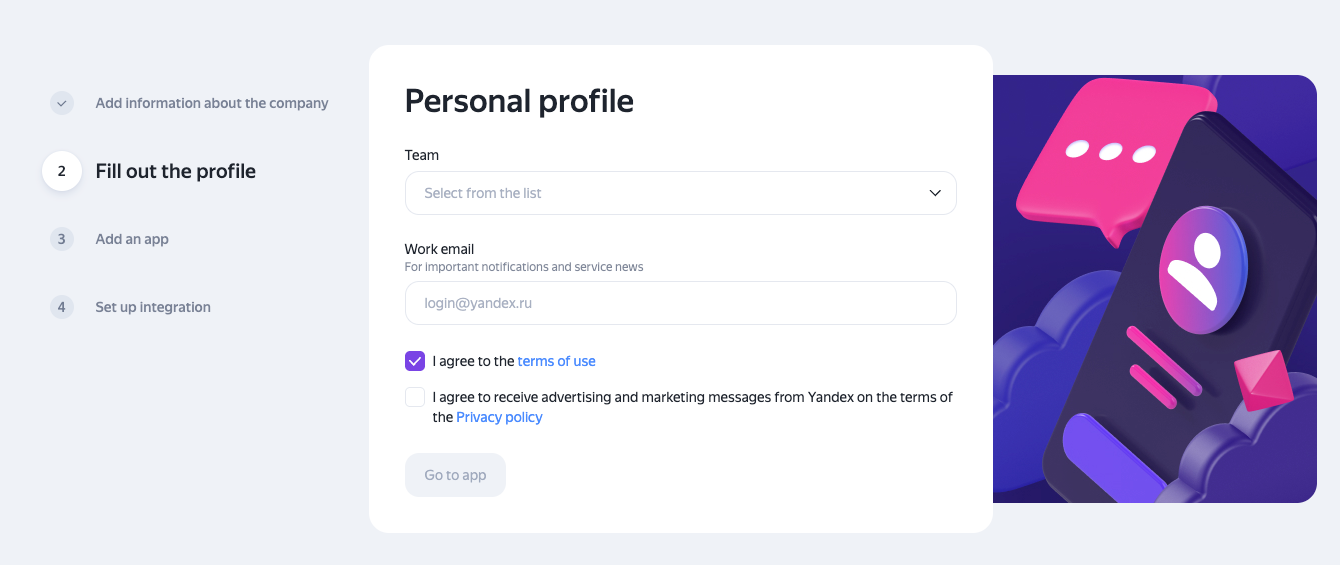
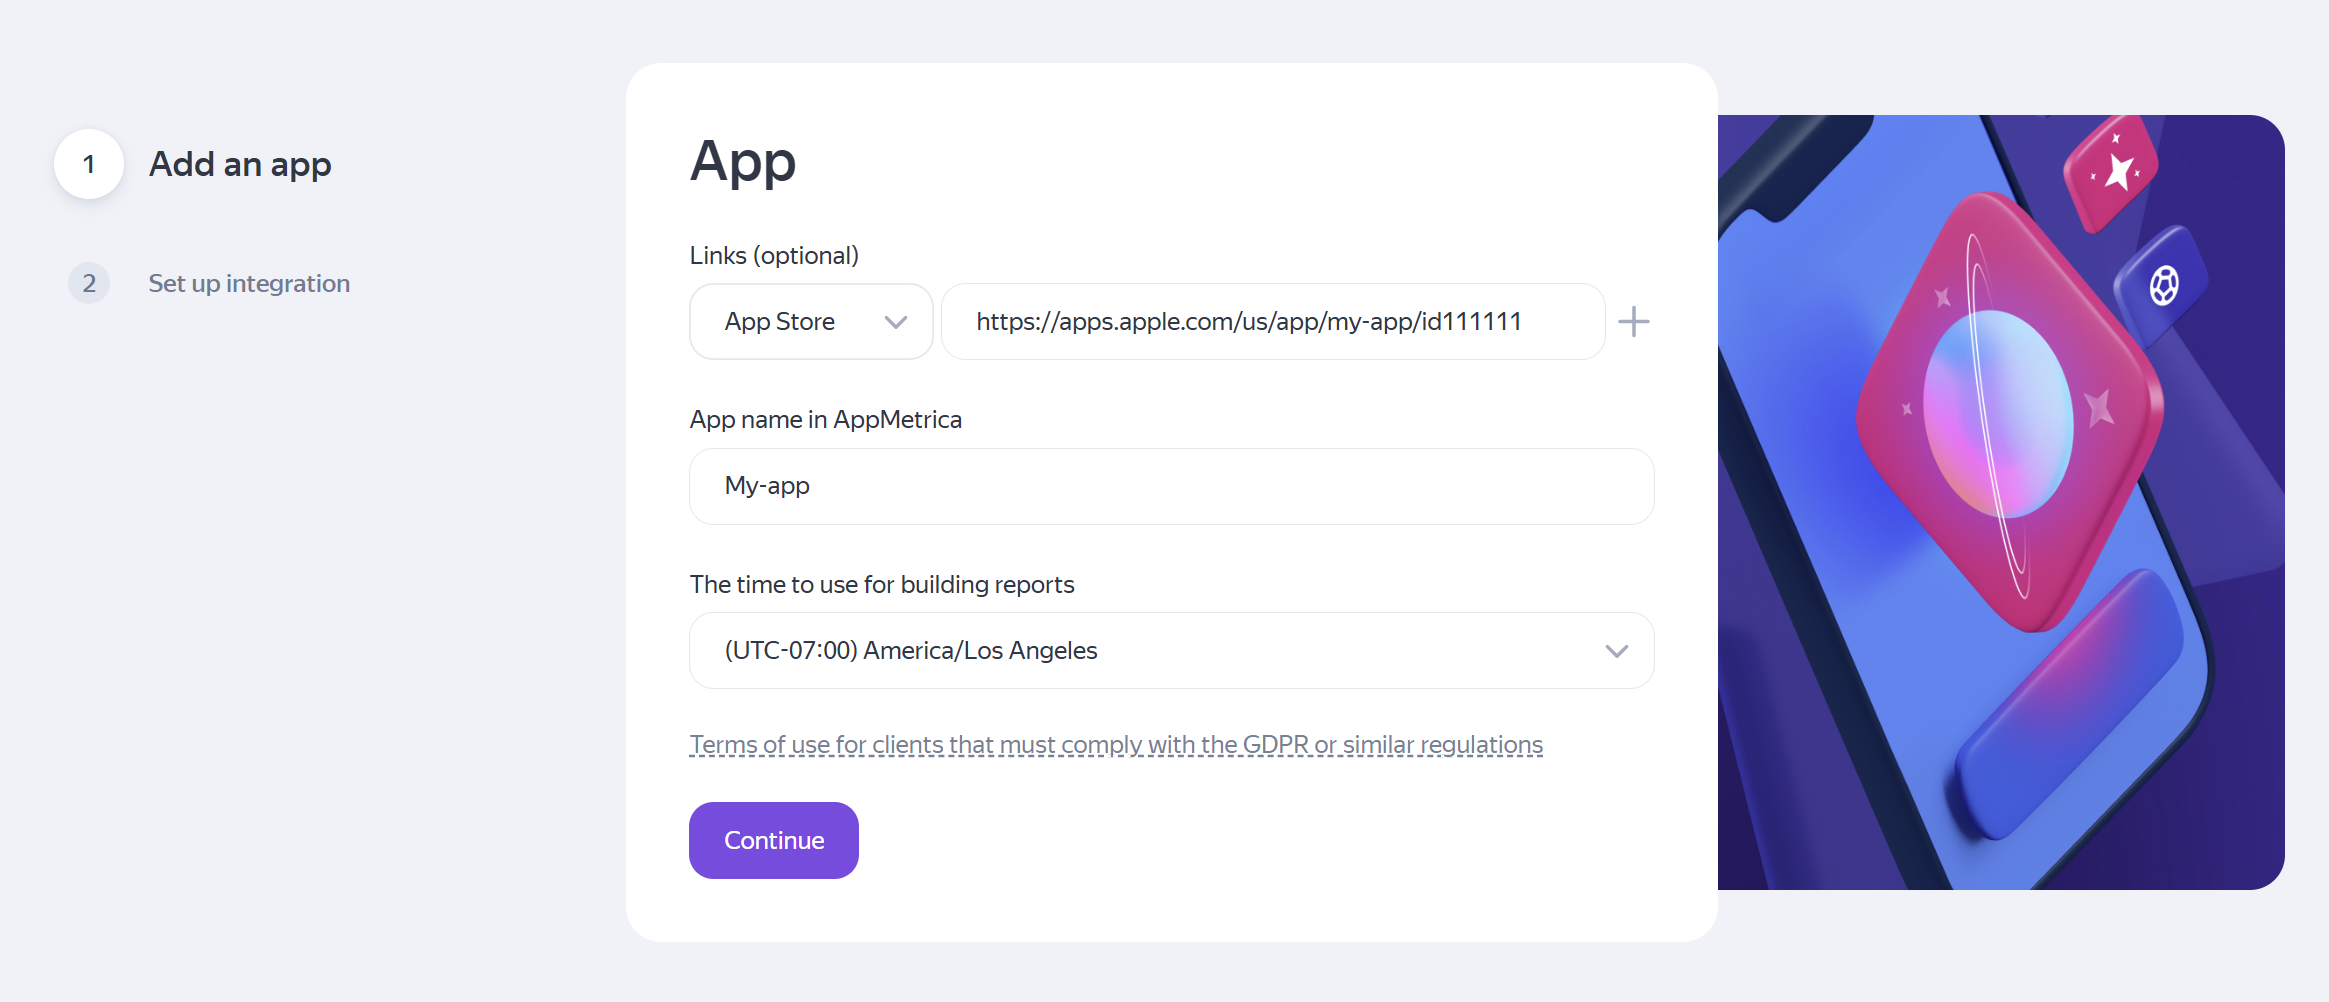
Create an account and provide the following information:
|
Company: Enter your company name, country of registration (important if you plan to use paid tools), and site URL if you have one. If your company is registered outside Russia, enter its name using Latin characters. |
|
|
Profile: Specify the team that will be using the service and provide an email address for notifications. You'll also need to accept the terms of use in this section. |
|
|
App: Provide your app's store link (for example, on Google Play or the App Store), name to display in your account, and reporting time zone. If you manage multiple apps, add just one for now: you can add the others after setting up your account. |
|
|
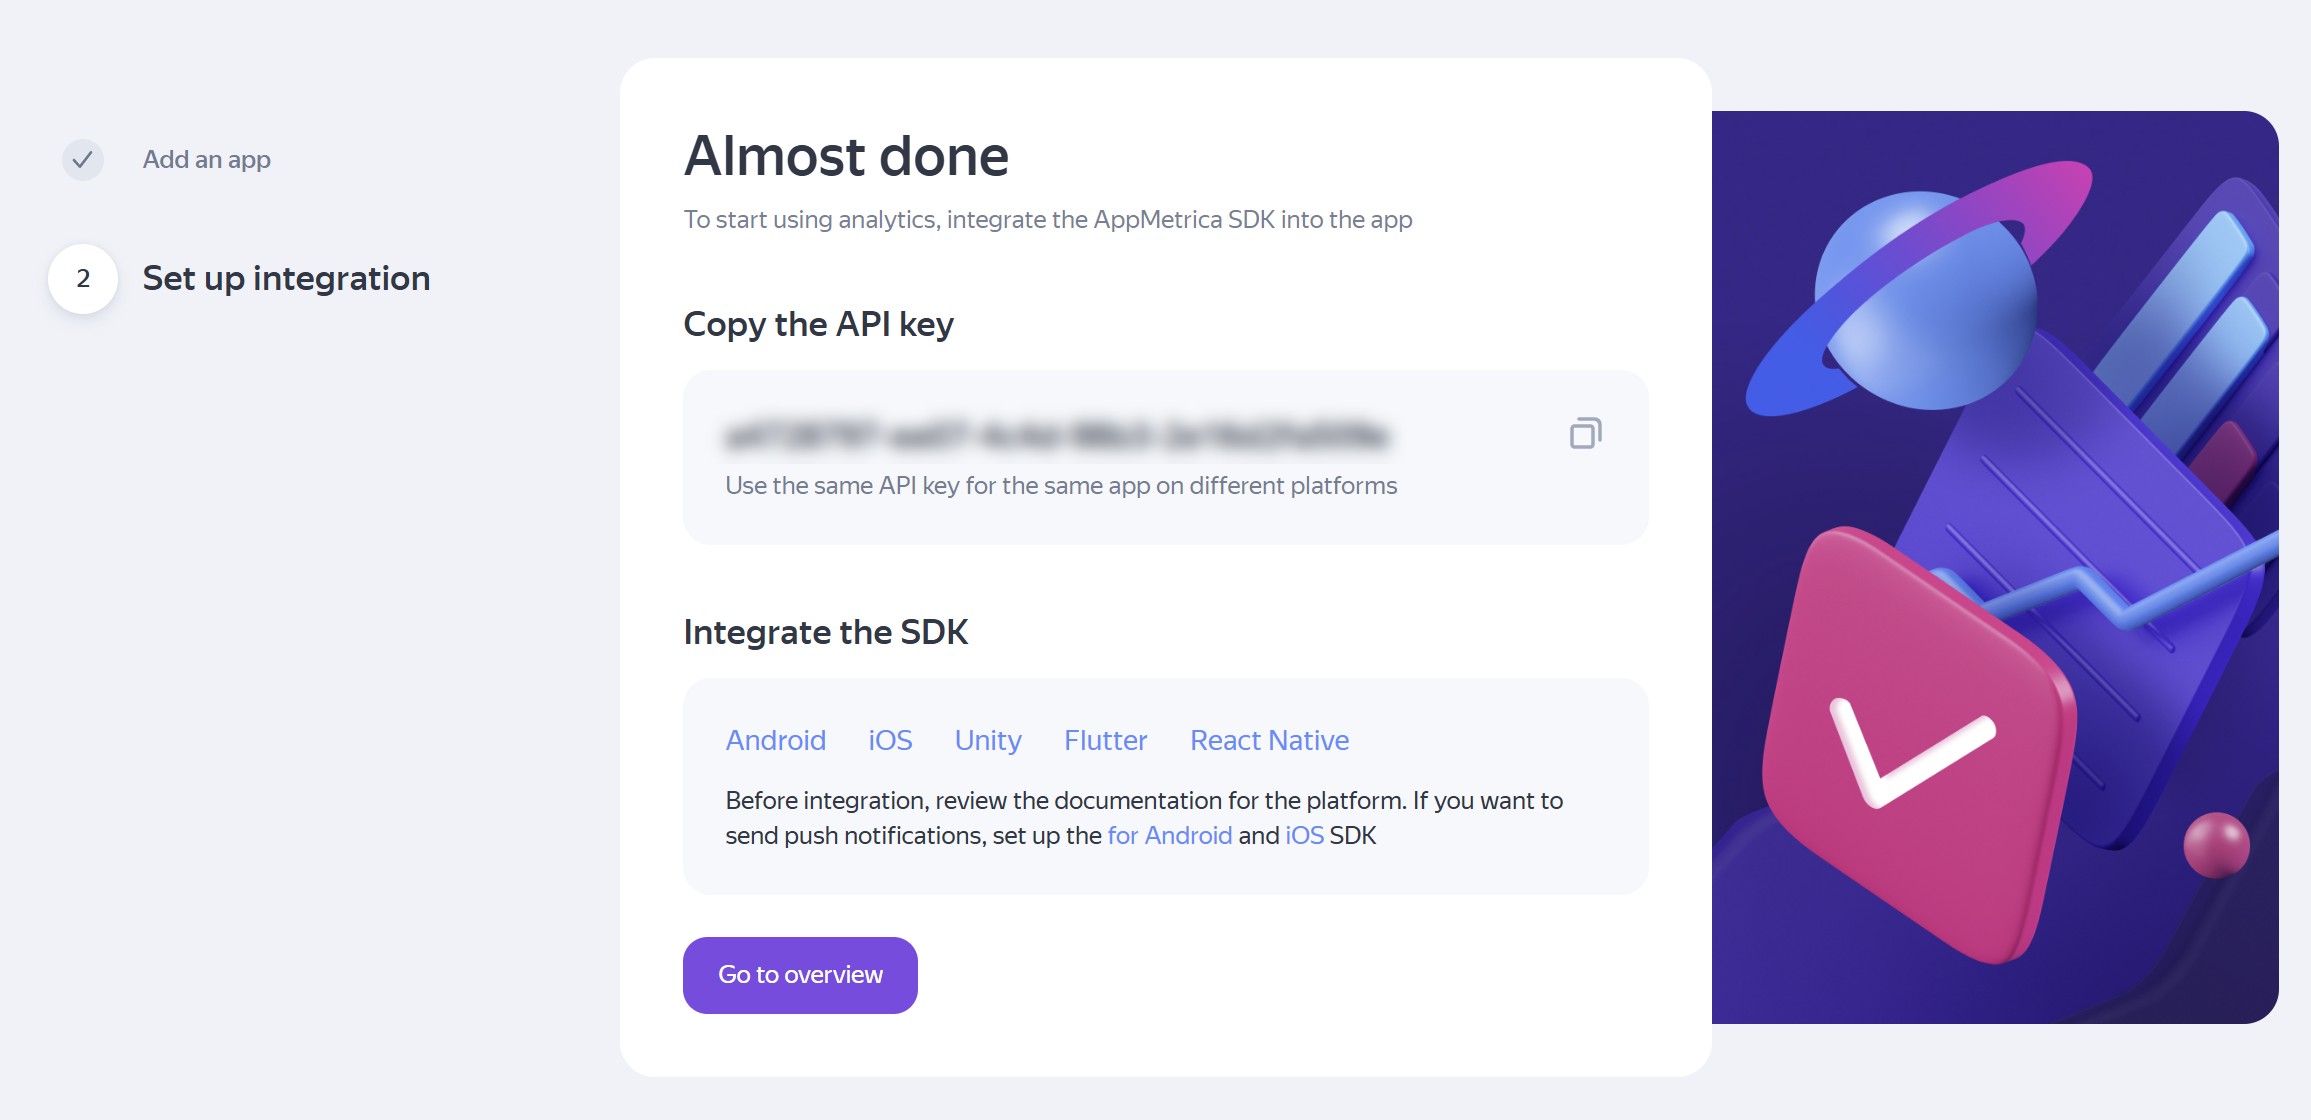
Once finished, you'll receive an API key for the next step. If you didn't save it, you can find the key in your account at any time under Settings → Main. |
|
Step 2. Set up access for your team
Who performs this step: account owner. Time required: 1 minute per person.
Note
If you use AppMetrica alone, you can skip this step.
Subsequent steps involve different team members, such as a developer to install the SDK, a marketing expert to define conversions, and an analyst to generate reports. Set up access in advance to avoid interruptions caused by team members waiting for an invitation. To learn more about access levels and what a user can see, read Managing access.
If a contractor or agency manages your app, make sure they have the necessary access rights as well.
Step 3. Install the SDK and make sure it's transmitting data
Who performs this step: product manager, developer. Time required: 3 hours or more.
An SDK is a library that collects data within your app and sends it to AppMetrica Without it, your reports will be empty.
-
Send the following to your developer:
- The API key obtained via the instructions above. Use the same API key for all app versions and platforms — otherwise, your data will be split across multiple accounts.
- Information on setting up data collection.
- Platform-specific instructions:
- Android: SDK integration, usage examples.
- iOS: SDK integration, usage examples.
- Unity: SDK integration, usage examples.
- Flutter: SDK integration, usage examples.
- React Native: SDK integration, usage examples.
-
Check the results. The first sessions will start appearing in your reports just a few minutes after installing an app version that includes the SDK. To ensure data collection works properly before release, add test devices.
-
Discuss the advanced settings with your developer: it's cheaper to configure them right away than doing it later. The AppMetrica team recommends:
- Importing attributions from other SDKs if you're switching from another analytics system.
- Configuring accurate tracking of new users when integrating the SDK into a live app (Android | iOS).
- Enabling GAID/IDFA (Android | iOS).
- Setting up deeplink and Universal link tracking if you plan to drive traffic to your app.
-
if you plan to send push notifications, set up the AppMetrica Push SDK. This is a separate library you can install on top of the analytics SDK you already integrated:
Step 4. Set up events
Who performs this step: product manager, developer. Time required: 1 hour or more.
The SDK automatically collects some types of data, including installs, launches, sessions, app versions, and crashes. However, any events related to money or your product's logic require additional setup — they won't appear by default.
Basic events are configurable but follow predefined AppMetrica rules:
- E-commerce: The user journey to a purchase, covering the product card, cart, and payment.
- In-app purchases and in-app subscriptions: Revenue generated within your app.
- Ad revenue: Revenue from in-app advertising.
- Crashes and errors: Bugs occurring inside the app.
Custom events track all other actions significant to your product, such as adding an item to favorites, completing a level, or submitting a form.
- Start by making a list of events you want to analyze, focusing on the ten most important ones for now rather than trying to set up everything at once.
- Add parameters to your events: instead of just "button click", include the path to the button, its position, and other relevant context.
- Send events directly from the SDK, or via the Post API if you're already collecting data on your server.
- Be sure to check the custom event limits — they count toward your plan quota.
To learn more about existing events and their differences, see About events.
Step 5. Explore your account
Who performs this step: everyone who will be using the service. Time required: 1 hour.
Now that you're collecting data, let's find out where you can view it. The account page is organized into several distinct sections:
- Reports: Structured data on your app's product, marketing, monetization, crashes, and errors. You can save any report, narrow it by applying a segment, or gather the data you need in a dedicated workspace. For a complete list of reports and metrics, see Reports.
- Tracking: Media sources, campaign trackers, conversions, and postbacks.
- Settings: App settings, access management, profile attributes, event list, and test devices.
- Additional tools: Push campaigns, Varioqub (A/B experiments and flag configuration), and data exports.
All information you see in the interface can be retrieved programmatically. You have access to the Management API for working with apps, the Reporting API for statistics, the Logs API and Data Stream API for exporting raw data, the Post API for uploading events from your server, and the Push API for launching push campaigns. For information on how to log in and get started, see Working with the API.
Step 6. Understand your plan options
Who performs this step: account owner. Time required: 20 minutes.
You can get started for free. With the Free plan, you get standard reports, custom events, push campaigns, A/B experiments, the Logs API, and the Data Stream API — enough for full-fledged analytics.
If you hit limits or need paid features, check out the Custom and Pro plans: see the prices in rubles or other currencies.
Consider our promotional offers — you can use them to get an extended plan on special terms if you’ve defined your conversion events.
Step 7. Complete the training
Who performs this step: everyone who will be using the service. Time required: optional.
- Training course: A basic course on the service's features.
- Materials and case studies: Task breakdowns and best practices from other teams.
- Community chat: Ask your colleagues and the AppMetrica team.
- Certification: For those who want to test their knowledge and earn a specialist certificate.
You're all set
Review this list to confirm you're fully set up:
- In the Overview report, you can see installs, sessions, and active users.
- In the event list, you can see all your events with the correct names and parameters.
- You've defined conversion events, and conversion actions appear in your reports.
- Your team members, contractors, and agencies have the access level appropriate for their role.
- You know what plan you have and where to see your limits.
If everything is in order, you can start using the service: monitor user behavior, evaluate campaigns, and set up push campaigns and experiments.
If something on the checklist isn't working, go back to the relevant step or see FAQ and troubleshooting. If you still have questions, contact support via the feedback form.